

Learning how to make deviled eggs is a culinary rite of passage, and this classic recipe is the only one you’ll ever need. It’s my tried-and-true method for achieving an unbelievably rich and creamy yolk filling with the perfect tangy finish. This isn’t just about boiling eggs; it’s about creating a beloved American appetizer that disappears from the plate in minutes. Forget past experiences with dry or bland fillings. This guide will show you how to make deviled eggs so good, they become your signature dish for every holiday and potluck.
Why You'll Love This Recipe
- You get perfectly cooked yolks with no gray rings
- The filling is luxuriously smooth and ultra-creamy
- Its tangy and savory flavor is perfectly balanced
- A crowd-pleasing appetizer for any occasion
- I’ve made these for years and they’re always the first to go
Ingredients You’ll Need
- Large eggs: The star of the show. Using large eggs gives you the perfect white-to-yolk ratio for a substantial, satisfying bite.
- High-quality mayonnaise: This is the foundation of the filling’s creamy texture. A good quality mayo adds richness without being greasy, so choose one you love the taste of.
- Sour cream or full-fat Greek yogurt: This is the secret to an extra-creamy, tangy filling. It adds a wonderful brightness that cuts through the richness of the yolks and mayo.
- Dijon mustard: Provides a sharp, tangy counterpoint to the creamy base. It adds a subtle complexity and depth of flavor that plain yellow mustard just can’t match.
- White wine vinegar: A small splash awakens all the other flavors. Its acidity brightens the entire mixture and makes the filling taste fresh and balanced.
- Fine sea salt: Essential for seasoning. Fine sea salt dissolves easily into the filling, ensuring every bite is perfectly seasoned without any grittiness.
- Freshly ground black pepper: Adds a touch of gentle warmth and spice. Grinding it fresh makes a huge difference in aroma and flavor.
- Smoked paprika: This garnish is more than just for color. A light sprinkle adds a beautiful smoky note that complements the creamy filling perfectly.
- Fresh chives: Adds a delicate, fresh onion flavor and a pop of green color. They provide a lovely contrast to the richness of the eggs.
- Fresh dill: Offers a unique, slightly tangy and grassy flavor that pairs beautifully with eggs. It’s a classic garnish for a reason.
- Crumbled crispy bacon: For a savory, salty crunch. Bacon makes everything better, and its smoky flavor turns these deviled eggs into a truly next-level appetizer.
How to Make It
Start with the Perfect Hard-Boiled Egg:
Your journey for how to make deviled eggs begins with cooking the eggs perfectly. Place your twelve large eggs in a single layer at the bottom of a large pot. Don’t overcrowd them, as you want the water to circulate freely. Cover the eggs with cold water by at least one inch. Starting with cold water helps the eggs cook more evenly from the outside in, which is a key first step in preventing that dreaded green ring around the yolk. Place the pot on the stove over high heat and get ready for the magic to happen.
Bring to a Boil and Then Rest:
Bring the water to a full, rolling boil. This is a vigorous boil, not just a gentle simmer. The moment it reaches this point, immediately turn off the heat completely. Cover the pot with a tight-fitting lid and move it off the hot burner. Let the eggs sit undisturbed in the hot water for exactly 12 minutes. Set a timer and resist the urge to peek! This gentle, residual-heat cooking method is what cooks the yolks to a firm, bright yellow perfection without overcooking them into a dry, chalky, or gray state. This is the foolproof secret to beautiful yolks.
Prepare the Ice Bath:
While your eggs are resting in the hot water, it’s time to prepare their cold plunge. Fill a large bowl with a generous amount of ice and then add cold water. This ice bath is a critical step, not an optional one. Its purpose is twofold. First, it immediately stops the cooking process, ensuring the yolks don’t continue to cook from the residual heat. Second, it causes the egg white to contract slightly from the shell, which makes peeling them significantly easier. A proper ice bath is your best friend when learning how to make deviled eggs.
Cool and Peel the Eggs:
After the 12-minute timer goes off, use a slotted spoon to carefully transfer the cooked eggs from the hot pot directly into the prepared ice bath. Let them chill completely for at least 10 to 15 minutes. Once they’re fully cooled, gently crack an egg all over on a hard, flat surface. The more cracks you make, the easier it will be to remove the shell in larger pieces. The best way to peel them is under a gentle stream of cool running water, which helps to get under the thin membrane and lift the shell away cleanly. After peeling, pat each egg dry with a paper towel to remove any excess moisture.
Separate the Yolks and Whites:
With your perfectly peeled eggs ready, it’s time to separate them. Slice each egg in half lengthwise using a sharp knife. For a super clean cut, you can wipe the blade between each slice. Carefully pop the cooked yolks out of the whites with your fingertips or a small spoon and place them all into a medium-sized mixing bowl. Arrange the empty egg white halves neatly on your serving platter. This is the canvas for your amazing deviled egg filling.
Mash the Yolks for a Smooth Base:
Now, focus on the yolks in your bowl. Using the back of a fork, mash them thoroughly until they have a fine, crumbly, and uniform texture. You want to break down all the large pieces and create a smooth foundation for your filling. This step is crucial for avoiding lumps later. If you want a truly silky-smooth, almost mousse-like filling, you can press the cooked yolks through a fine-mesh sieve into the bowl. This extra step is my secret weapon for the absolute best deviled eggs.
Create the Creamy Filling:
Once the yolks are mashed, add the high-quality mayonnaise, sour cream, Dijon mustard, white wine vinegar, fine sea salt, and freshly ground black pepper directly to the bowl. Use your fork or switch to a flexible rubber spatula to mix everything together. Keep mixing until the filling is completely smooth, creamy, and well combined. Scrape down the sides of the bowl to ensure everything is incorporated. For an even smoother texture, a hand mixer on low speed for about 30 seconds works wonders. This is the heart of how to make deviled eggs that stand out.
Taste and Adjust Seasoning:
This is arguably the most important step. Before you fill the eggs, you must taste the filling. Does it need another pinch of salt to make the flavors pop? A little more vinegar for a tangier kick? Or maybe a bit more mustard for spice? Your ingredients, especially the mayo and mustard, can vary in saltiness and tang, so adjusting to your personal preference is key. A perfectly seasoned filling is what makes people ask for your recipe.
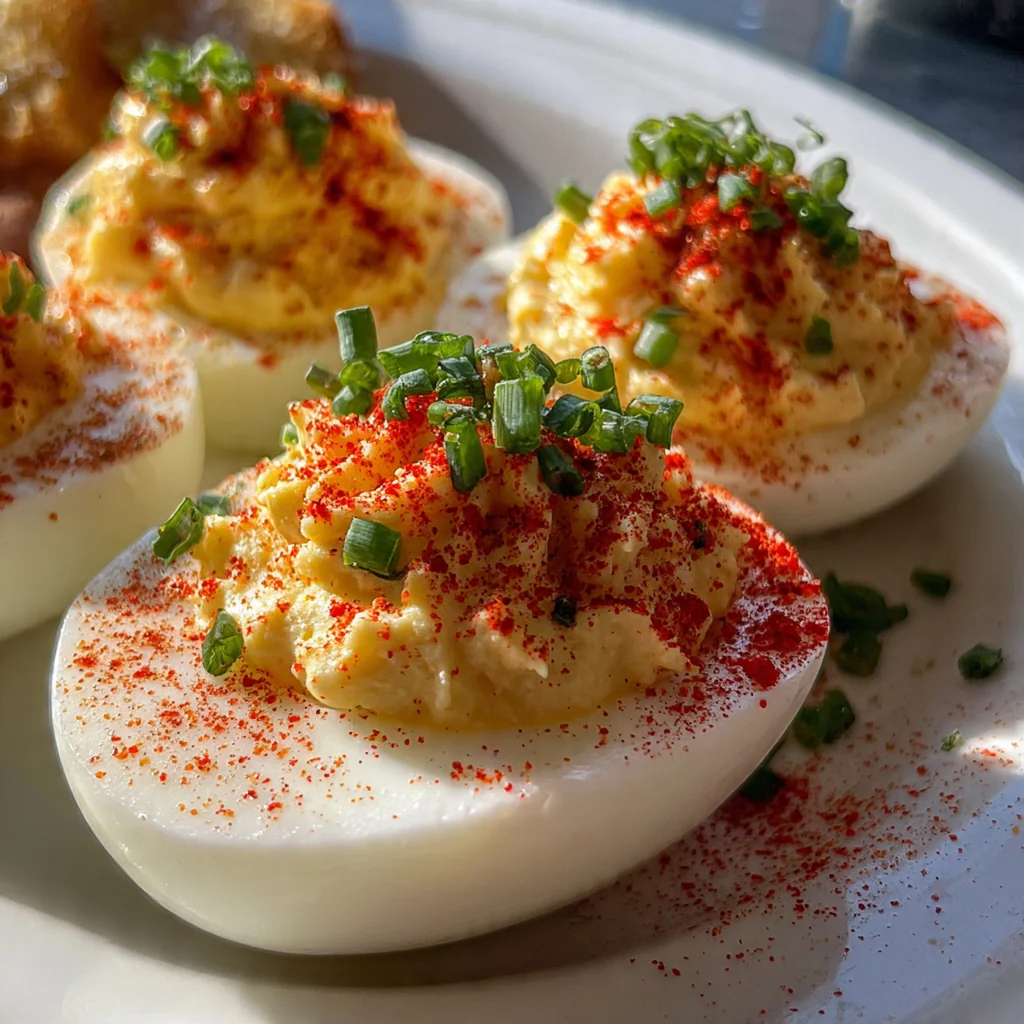
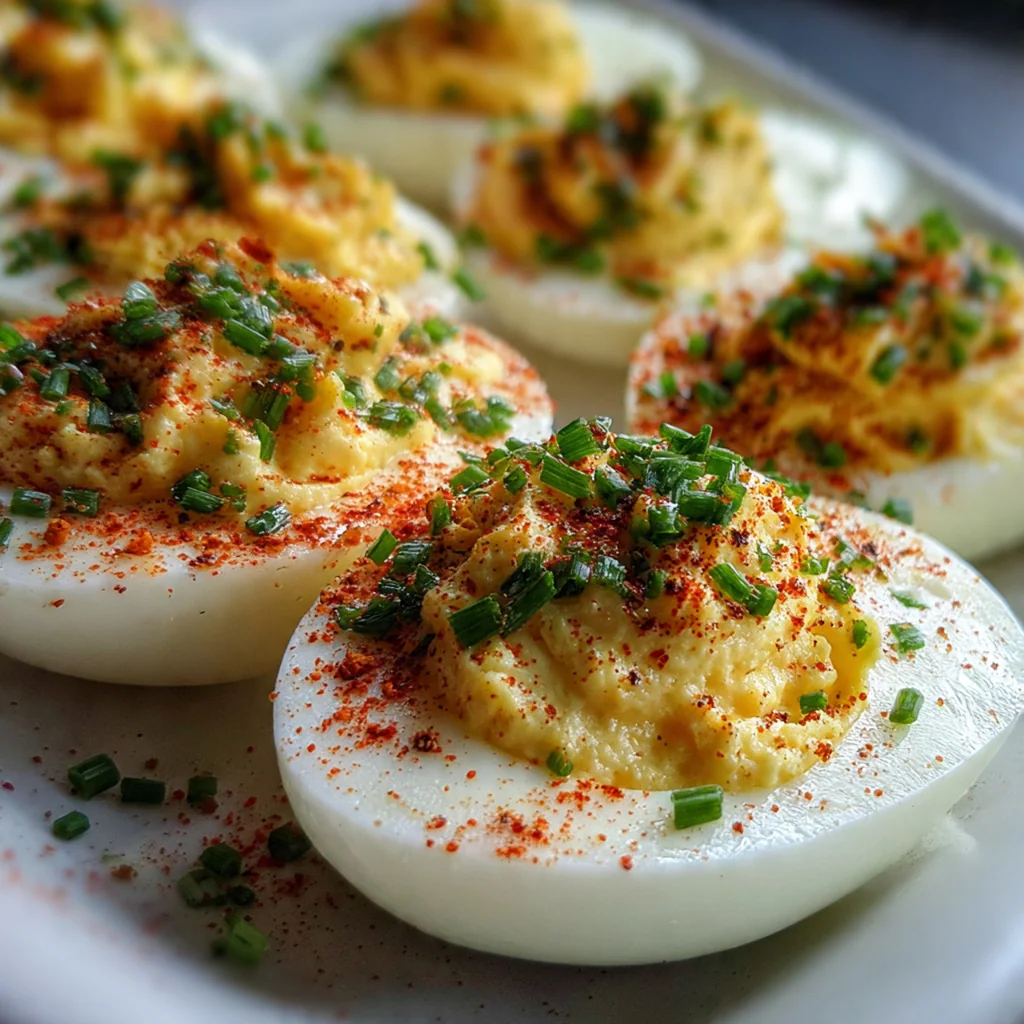
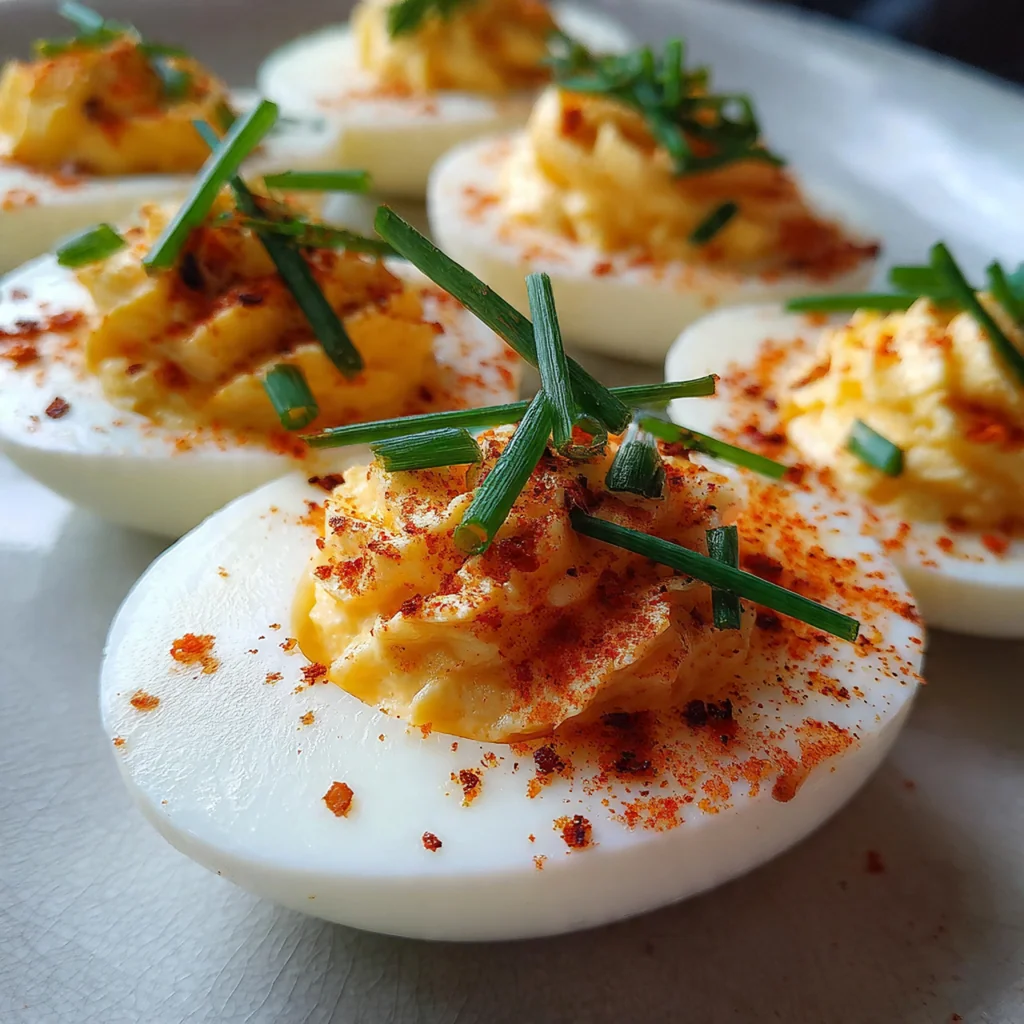
Fill and Garnish the Eggs:
Now for the fun part: filling the egg whites. You can carefully spoon the yolk mixture into each egg white half, but for a more elegant and professional look, I highly recommend piping it in. You don’t need a fancy pastry bag; a simple plastic ziplock bag works perfectly. Just spoon the filling into the bag, push it down to one corner, and snip off the tip. Pipe a generous swirl of the creamy filling into each egg white. To finish, garnish your beautifully filled deviled eggs with a light sprinkle of smoked paprika and some finely chopped fresh chives just before serving. They’ll look as amazing as they taste.
You Must Know
- Starting with cold water cooks eggs more evenly
- The ice bath is non-negotiable for easy peeling
- Taste the yolk filling before you start piping
- This simple method is the key to perfect deviled eggs
Storage Tips
To keep your deviled eggs fresh, store them in a single layer in an airtight container in the refrigerator for up to two days. If you’re making them ahead of time for a party, the best method is to store the prepared egg whites and the yolk filling separately in airtight containers in the fridge. You can do this up to a day in advance. Then, just before serving, simply pipe or spoon the filling into the whites. This keeps them from getting watery and ensures the freshest possible taste. For transport, a deviled egg carrier is a fantastic investment to prevent them from sliding into each other.
Ingredient Substitutions
This classic recipe is quite flexible. If you don’t have sour cream, full-fat Greek yogurt is a perfect substitute and provides that same tangy creaminess. For a different flavor profile, you could swap the Dijon mustard for a spicy brown mustard or even a touch of horseradish for a zesty kick. To make this recipe dairy-free, simply use a dairy-free sour cream alternative or omit it and use an extra tablespoon of your favorite mayonnaise. While white wine vinegar is classic, apple cider vinegar or even fresh lemon juice can be used in a pinch to provide that necessary acidic brightness.
Serving Suggestions
These classic deviled eggs are the ultimate versatile appetizer. They are an absolute must-have on any holiday platter, especially for Easter, Thanksgiving, or Christmas gatherings. At a summer barbecue, they are the perfect cool and creamy bite to serve alongside grilled burgers and hot dogs. For a potluck, they are always one of the first dishes to disappear. I love to arrange them on a large platter as the centerpiece of an appetizer spread, surrounded by other finger foods like pigs in a blanket, a fresh vegetable tray with dip, or as part of a grand charcuterie board with various meats, cheeses, and crackers.
Cultural Context
While stuffed eggs trace their roots all the way back to ancient Rome, the term ‘deviled’ emerged in 18th-century Great Britain to describe foods that were highly seasoned, spicy, or zesty. The name stuck, and the concept was applied to all sorts of dishes. The American-style deviled egg, with its creamy mayonnaise-based filling, became a true icon in the mid-20th century. It quickly cemented its place as a staple of American gatherings, from church potlucks in the Midwest to summer picnics in the South. It represents simple, accessible ingredients transformed into a reliable and beloved comfort food, a testament to its enduring popularity as a cornerstone of American home cooking.
Pro Tips
- Use eggs that are about a week old for easier peeling
- Push yolks through a fine-mesh sieve for a silky filling
- Don’t overfill the whites or they’ll be hard to handle
- A ziplock bag is a perfect, easy-to-use piping bag
- I always assemble them right before serving for freshness
Frequently Asked Questions
For this guide on how to make deviled eggs, perfectly cooked eggs are key. Start your large eggs in a single layer in a pot of cold water. Bring to a boil, then immediately turn off the heat, cover, and let sit for 10-12 minutes. An ice bath stops the cooking and makes peeling much easier!
Absolutely. You can make the yolk filling up to two days in advance. Just store it in an airtight container in the refrigerator with plastic wrap pressed directly onto the surface to prevent it from drying out. Store the cooked egg whites separately and fill them just before serving.
If you don’t have sour cream, full-fat Greek yogurt is the perfect substitute. It provides the same essential tang and creaminess that balances the rich mayonnaise and egg yolks. Use it in a one-to-one ratio as suggested in the ingredients.
The secret to a silky smooth filling is to press the cooked yolks through a fine-mesh sieve before mixing them with the mayonnaise and other ingredients. This breaks up any lumps for a velvety texture. This is our top tip for how to make deviled eggs perfectly.
Since this is a classic American appetizer, these deviled eggs are perfect for any holiday spread, potluck, or barbecue. They pair wonderfully with a relish tray, a charcuterie board, or as a starter before a holiday ham or turkey.